Quantcast
Channel: THE BRITISH RAILWAY STORIES LTD
Viewing all 149 articles
Browse latest View live

"Thompson B3/3 re-emerges…and some obligatory A4 modelling"

$
0
0

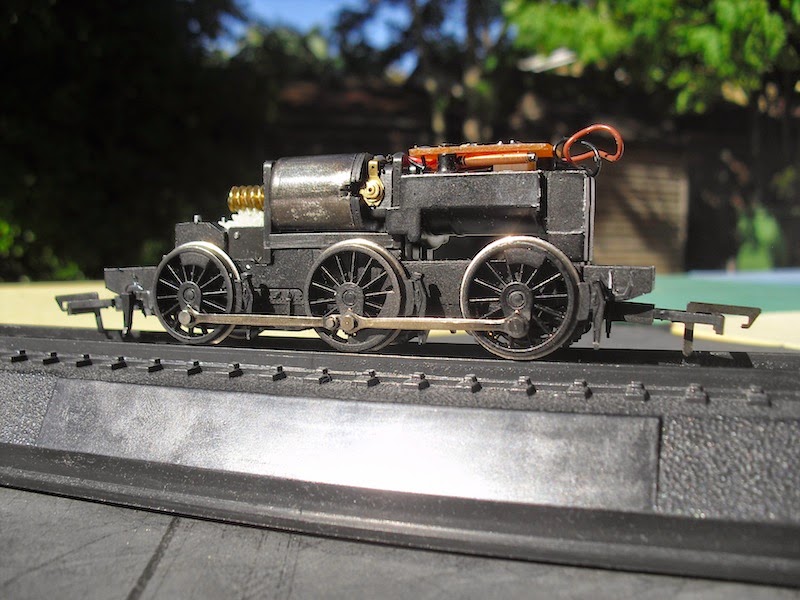
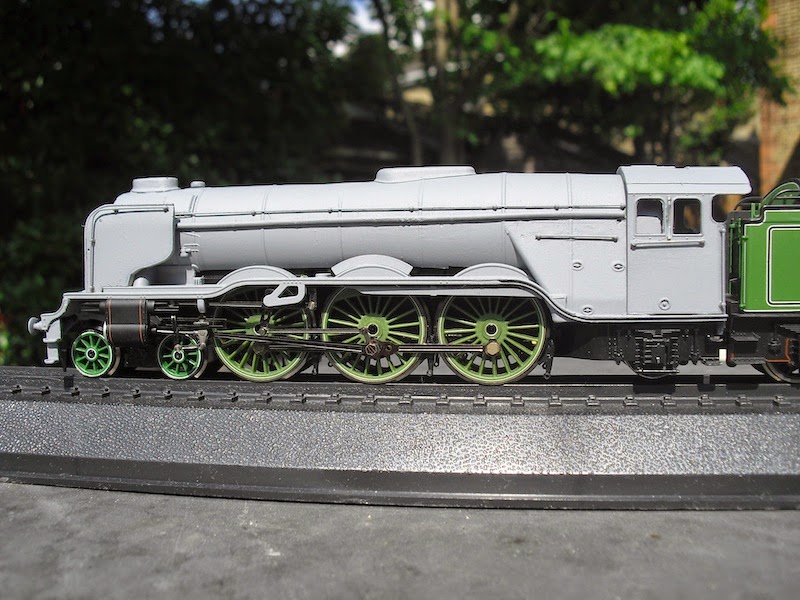
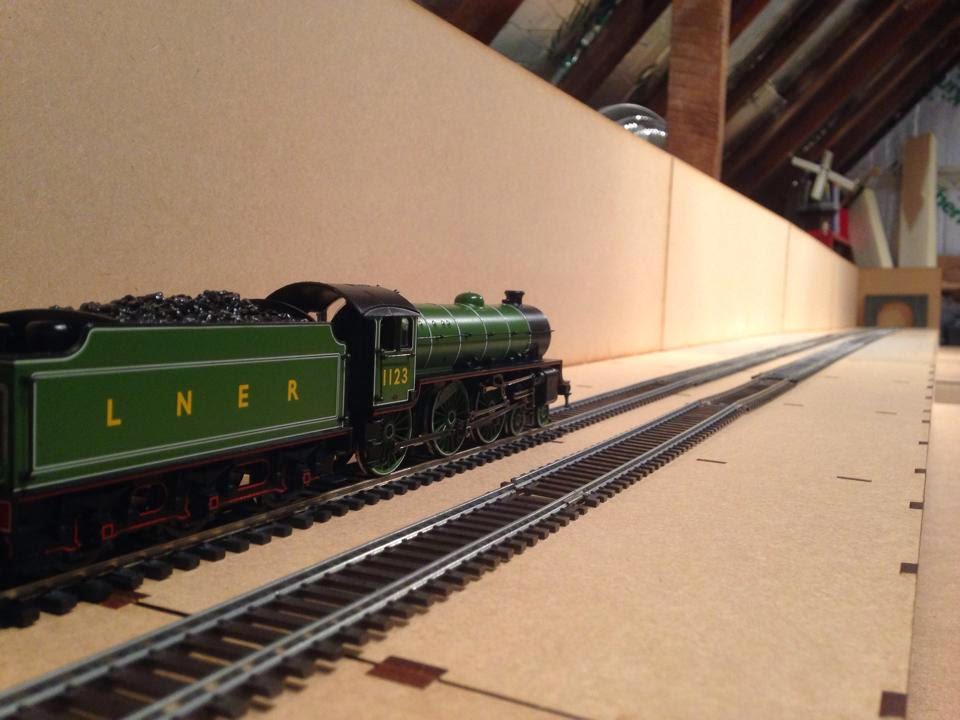
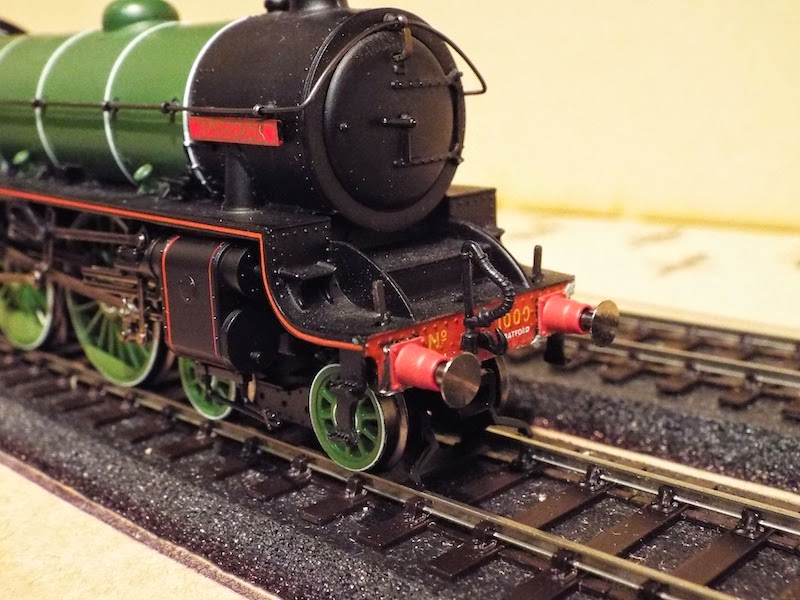
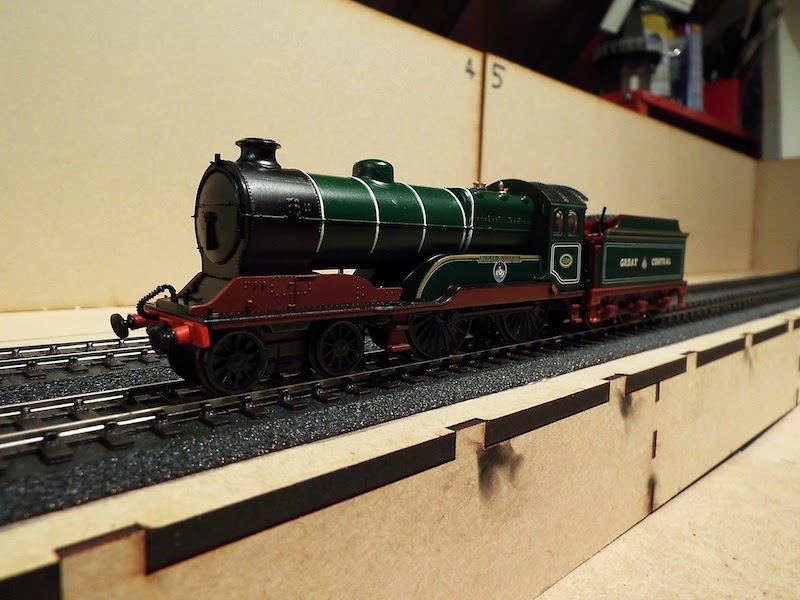
This model has been on the boil for nearly two years now. Started in what feels like a completely different life, I've now got around to shortening the B1 chassis at the front end, cutting and re-shaping the running plate (needed to be deeper) and adding the GCR swivel hook on the buffer beam.


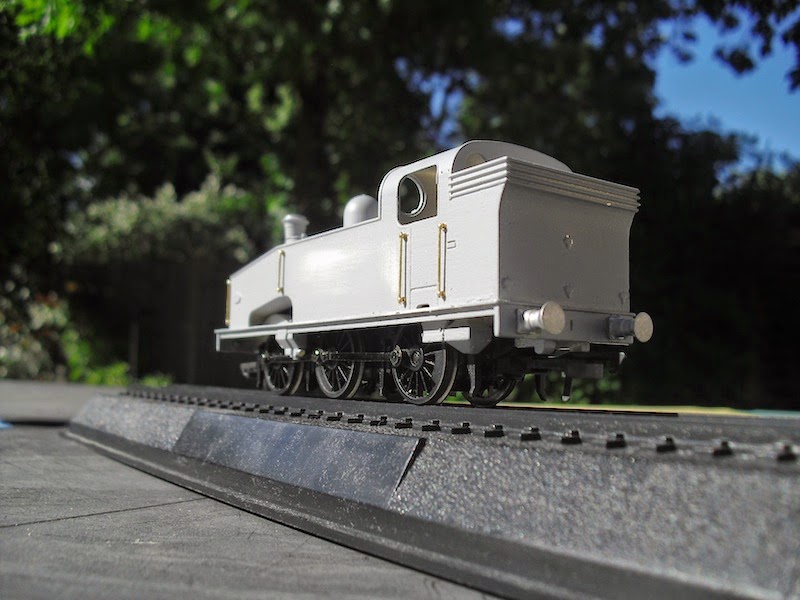
On the Isinglass drawings, the depth of the running plate is very similar to the B1, whereas period photographs show the depth of the running plate to be much deeper. I pondered over this for some time, before realising the pitch of the boiler matches that of the original GCR, which means that the standard fittings, though still all within 13ft high, makes the B3/3 slightly taller in a lot of areas compared to Thompson's standard B1 type.


This is perhaps best seen in a side on view. The steps are the correct length and pitched at the right height, but they do not match up to the steps of the GCR tender, unsurprisingly. The handrails have been fitted to the cab - notice the handrails on the front of the cab, one way of recognising the B3/3 aside from the as yet to be modelled splashers, or the larger 6ft 9in wheels (which are Hornby Royal Scot drivers, suitably modified with new balance weights).

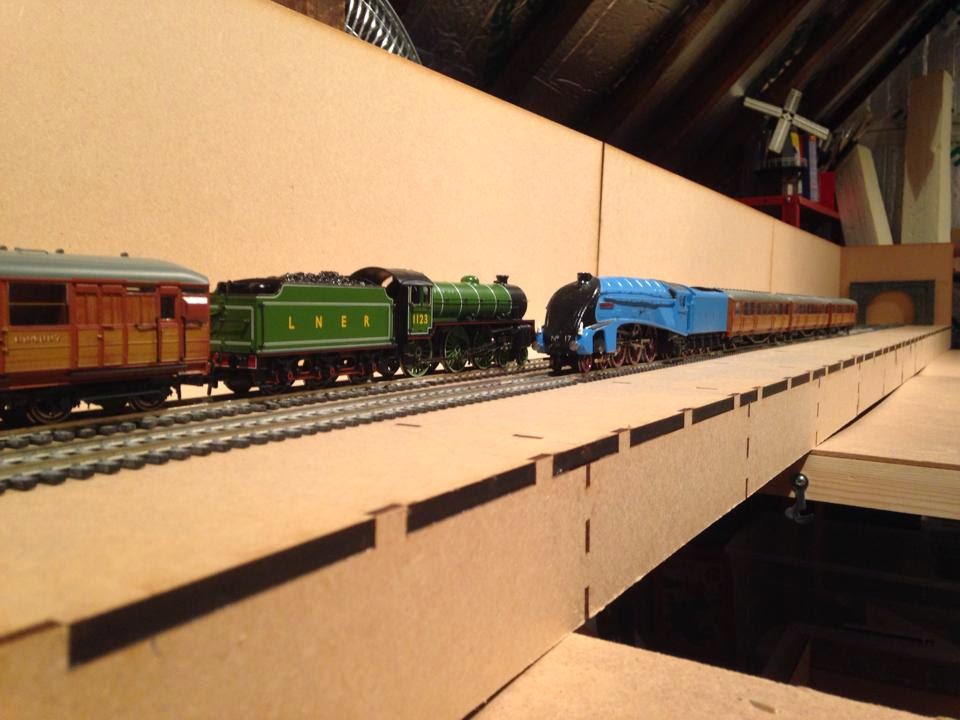
Also note the replacement, larger bogie wheels fitted to a Thompson L1 bogie. I am hoping once the guard irons are removed, and a set of separate fittings are attached to the front buffer beam, that the model will look much improved in this area next time out.


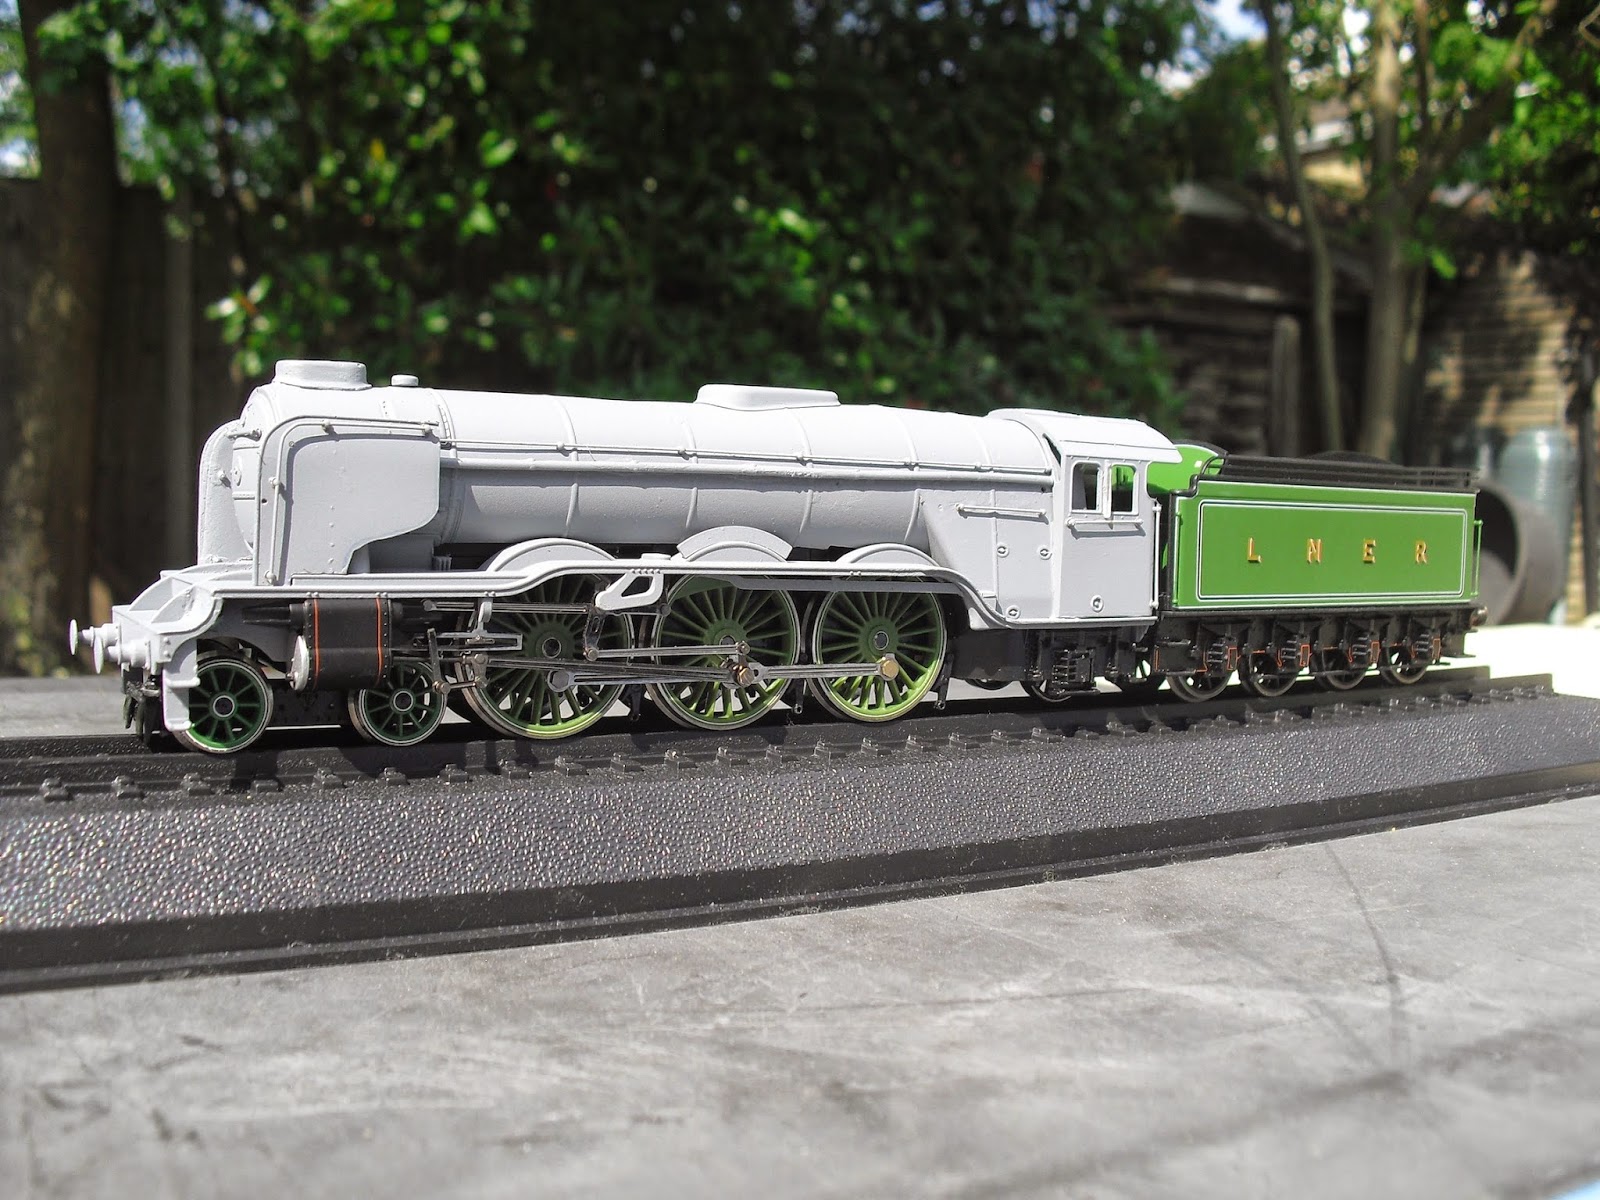
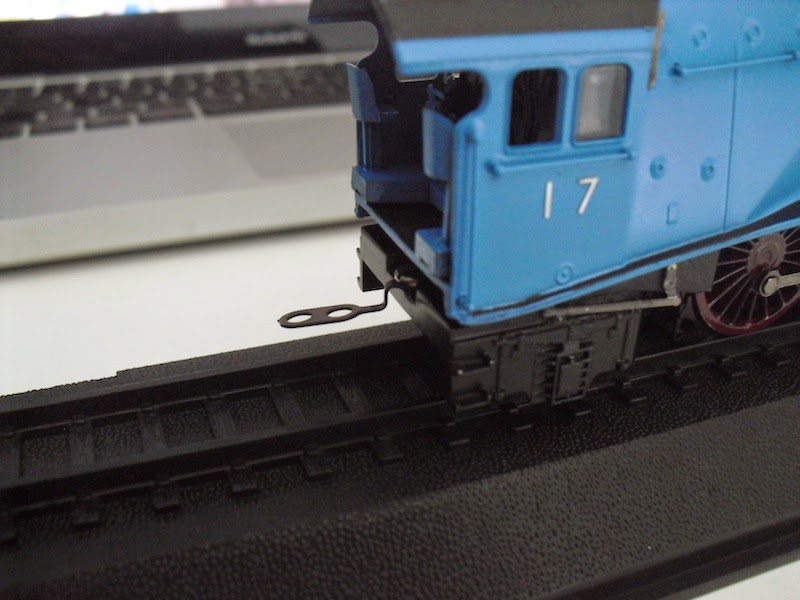
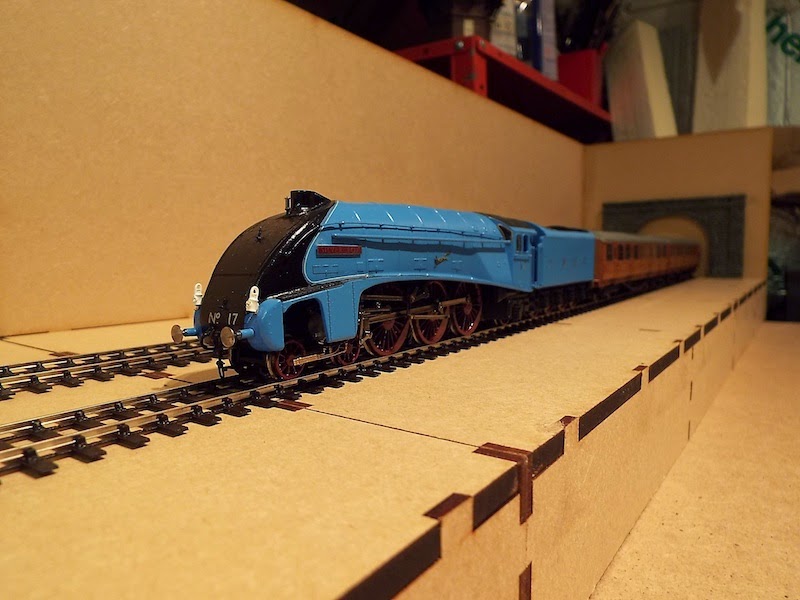
I am fast approaching the finish line with no.17 Silver Fox, with the welcome addition of Fox Transfers excellent etched numerals and lettering for LNER no.17.


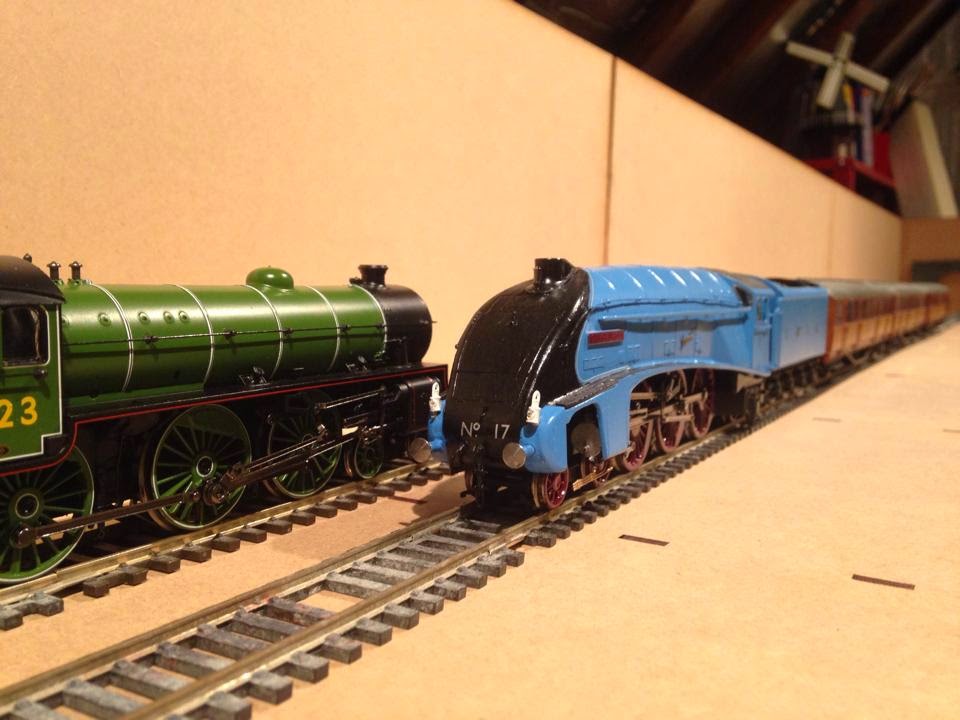
 Yes, the numbers are off-centre. I had to check and double check this, but this is accurate for no.17 Silver Fox on this side only, in a photograph dated 1947. Since I want my fleet of A4s to be a mixture of LNER and British Railways branding, I elected for this combination for prototype 1 to show off the modelling to its best advantage.


The eagle eyed amongst you will note that this is not the correct tender for no.17, that having a 1935 bow ended, streamlined corridor tender and not one of the original 1928 stock (which this tender is). I have elected to leave the top half above the beading blue for the time being until such a time I can source, paint and finish a 1935 type tender for no.17.


Last things to do include adding lamp irons (always a pain and always left until last), adding the coupling, cab spectacle etches, then weathering and sealing with Johnson's Klear. I hope to have all of these done within the month, and also finish the Hornby chassis prototype 2.

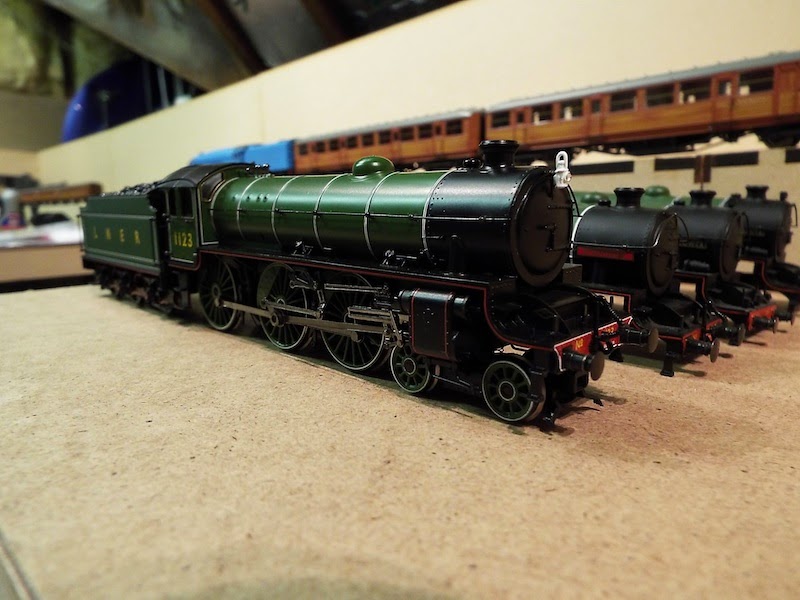
Though I must confess, I have almost made my mind up on which chassis I am going to standardise on. It is increasingly looking like being the Bachmann type, it being heavier, more powerful, smoother and with the die cast cartazzi and lower firebox sides, less of a pain to mount these cheap GBL bodies on.
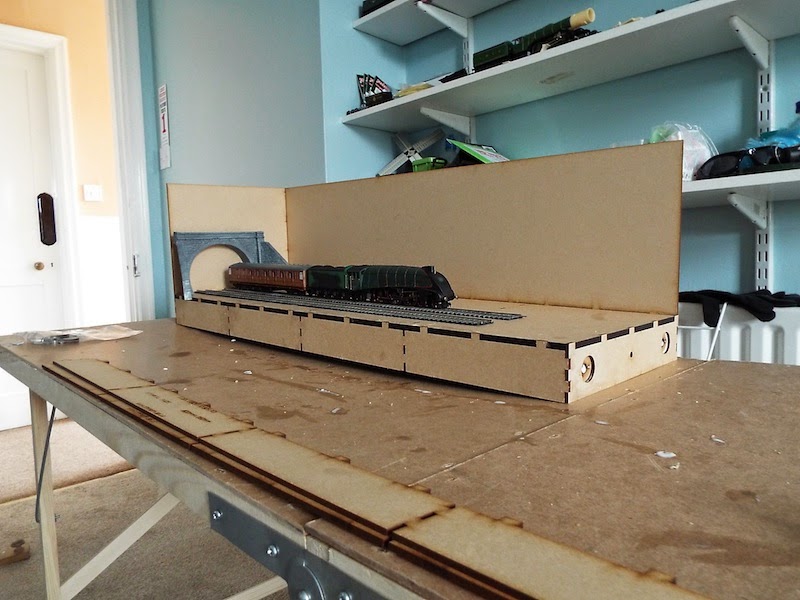
Until next time.

"Modelling roundup: A4, J50, N1, A2/2 and a few more…"

$
0
0

This is an absolute bumper round up of LNER modelling on a scale I've not quite done before. So bear with me…!


First up, my A4 Pacific project no.17 Silver Fox. She's nearly done!


I have posed her in front of my copy of Craig Tiley's excellent portrait of Mallard at speed on her record breaking run. Note the comparison in blue colours. Just lamp irons to add and she will be ready to roll for a date with destiny at Little Bytham later this month...


Next up, my third of four A4 Pacific projects. A Railroad Mallard was sourced and is being converted into another prototype for my A4 fleet. I am slightly miffed at Hornby though...

The previous incarnation of the Railroad A4 included the lubricator drive on the rear driving wheels. This has been removed for this generation. This would have swayed me away from the Bachmann chassis on its own, but no, this may remain a one off.

We shall see when it finished to compare with the other A4s. It too, has a new tender, in the form of a GBL 4472 corridor tender on a Hornby corridor chassis.


The original "prototype 1" has now been modified to fit on another Bachmann A4 chassis. The Railroad Scotsman chassis has been modified back to being an A1 chassis and will be seen in a future update…

This A4 is the next to be modified and will have handrails and other pieces added during the week before being primed and painted next weekend.


Next up, the excellent 3D printed J50, which I have finally done some modelling on. This comes from AJ Models, which you can find here.

It is not currently available as it is still in the testing period. However I can with confidence on the basis of this model, it will be out soon. It is stunning!


The first thing I did was lower the height of the body shell by filing down the blocks on its underside. It has been specially designed to fit the Bachmann Pannier tank chassis, and it fits perfectly.


You will notice that this Pannier tank chassis has been modified with the removal of the outside brake hangers and gear. This gives it an instantly more LNER look and is well worth doing.

In addition, I have fitted white metal buffers from Lanarkshire Models & Supplies, which were spare from two sets of their Gresley Pacific buffers. There was nothing wrong with the 3D printed buffers supplied, I hasten to add, but the casting of these group standard buffers was exquisite and - well - waste not want not!


The buffers fitted to the J50 above come in a pair with the Spencer type shown above on my Graeme King resin conversion of a Bachmann Peppercorn A2.

This buffer type has been difficult to obtain for some time and it is something of a relief to finally find a supply, and of a very good quality at that! The other set have gone to my other Thompson Pacific conversion, 60508 Duke of Rothesay.


At the rear end, I've finished lining out the tender frames and started on the cab. I first started lining this locomotive out three years ago and am determined to finish it over the summer! The locomotive will become 60506 Wolf of Badenoch.


As you can see, the buffers fit well and look the part. Some black paint and some metallic paint for the buffer heads and it'll nearly be finished at the front end. The lining out and a coupling to finish.


Finally, the other 3D printed locomotive and project from AJ models I have been working on, the Ivatt N1. Now finished physically with coal rails and painted in a plain black livery, it is currently waiting on some transfers before I move to weathering.


However I couldn't resist posing it with the coaches it'll be pulling on my new layout, a pair of Gresley suburban coaches. It really does look brilliant and I have to point out that this model IS now available and can be made to fit the Hornby/Dapol/Replica N2 chassis very easily.

Please, if you are after an Ivatt N1, buy this 3D printed kit (it really is the easiest, quickest way to get an N1 and it is the best you can buy. Honestly) and support another excellent part of our cottage industries.

That's it for the moment, my next modelling update will show you some baseboards…yes, a new layout is finally being built and I am very excited about it. I will put pictures up once track is permanently fitted and some scenery done. Not long now as it happens…

Until next time!

"AJModels J50/3 tank engine "

$
0
0

The sun was out, so I thought it would make a nice change from all of the Pacifics I've been building the last year or so to showcase what I can only describe as the next big thing in railway modelling.


AJModels have produced a superb 3D printed kit of the Ivatt N1 previously; indeed, I reviewed one and produced photographs to add to his excellent instruction manuals. 

His latest model is the Gresley J50, coming in various guises. I have previously shown this model (kindly donated for review and research) on the blog, but it is further along now and requires a little reintroduction. 


This particular body shell is for the Gresley J50/3 sub-class, and it matches the drawings and photographs I've gathered over the years extremely closely.

Previously, I added two sets of whitemetal LNER group standard pattern buffers. Yesterday, I added handrails, which have been fitted all round the locomotive. The body shell has dimples designed in so that you can drill out the holes in the right places.

Note that I haven't sourced a smokebox door dart yet! Items to add include lamp irons, coupling, grab handles on the smokebox and on the cab.


The chassis (originally from a Bachmann Pannier tank) has been modified with the removal of all of the sandboxes at the front and rear with a sharp scalpel, carefully applied at the front and behind the sandboxes. You can still see the marks (deliberately not sanded back as yet so that I could demonstrate where the cuts needed to be made).


Overall, the model sits pleasingly well on the Bachmann Pannier chassis. It has real presence, despite its small size, and for me is likely to be the big multiple choice tank engine I will look to buy and build. They were, after all, extremely numerous both in London and at a certain shed number 37B/56C...

This 3D printed body shell is likely to be the best way of producing a J50 in this scale. It is also available with a 3D printed chassis for the correct wheelbase, which looks extremely promising.

Until next time.

"No.103, Flying Scotsman"

$
0
0

You may remember this locomotive from a blog a few years back. It started out in life as a bog standard 2012 edition Railroad Flying Scotsman model.

It's now in grey primer and currently in storage. Modifications included changing the bogie and driving wheels, smokebox door, chimney, addition of superheater headers and resin washout plugs on the boiler. Oh, and a Great Northern coal rail tender to boot. More on that at a later date though…

It does link in with this evening's modelling session, however.


I've bought another of the Railroad Flying Scotsman models, and am finally getting around to building one of the locomotives that no respectable LNER based layout should be without. It is tradition, after all, to include a model of the world famous Flying Scotsman on a model railway layout, however my comes with a twist on the theme. She will be apple green, but she won't be numbered 4472...


Since my new layout is set between the years 1947 and 1949, I needed my model of 4472 (or as she was then, no.103) to reflect her true condition. So bits and bobs from the Great British Locomotives series of models have been used to bring this Railroad model up to standard, in addition to a few other details.

The basic model was correct in so much that it was right hand drive, with the correct 180lb boiler, but I was not satisfied with a number of other details and set to work converting the model accordingly.

(Incidentally, and perhaps proving the interchangeability point, the chassis pictured was the same chassis which had been previously fitted with maroon A4 wheel sets and originally intended for going under a Great British Locomotives Mallard model, as seen in these pages).


So to begin with: the corridor tender has been swapped with a GBL Mallard model (which will become another working A4 Pacific - again, watch this space) to give my model of no.103 the correct non corridor, streamlined tender it requires.

The boiler doesn't require any modification, as Flying Scotsman retained her original 180lb boiler until 1949 when she swapped it for the 220lb A3 boiler type. The only thing missing at the minute from this picture are the superheater headers on the smokebox, which will be fitted in due course. The moulded handrails on the boiler have to go though, and they will!


I removed the original cab from the Railroad model (through a combination of hacking it about with pliers, scalpels, files and sandpaper) and fitted a GBL 4472's cab instead.

This has the correct shorter cut outs at the back, to match the later tender types, and also includes glazing which is a real improvement on the model's original cab. Moulded handrails all round though, but these have been removed and handrails will be fitted next week when the next batch of handrail knobs arrives.


Lastly, at the front end, the correct (shorter) pattern chimney has replaced the original tall chimney, and a resin cast of Hornby's super detail A3 smokebox doors has replaced the more plain Railroad version.

The white metal buffers are standard with those on Wolf of Badenoch, seen alongside for comparison.

So I've a few projects on the go at the minute, but if I am honest I hope to get this one done, at least physically, before the end of next week so that it can come with 60506 and a few other Pacifics "oop north" to visit a very special model railway layout…more on that in due course.

Until next time!

"The backbone of the East Coast main line…The Gresley A3 fleet starts to emerge"

$
0
0

Hornby's Railroad Flying Scotsman. Retooled and then re-released in 2012, complete with an excellent new chassis incorporating a flywheel motor and die cast cartazzi. The heavier chassis runs very well and, in my experience, with a number of them the performance model to model is closer than the sometimes unforgiving super detail chassis.

However, we must remember that this new chassis - which only has pickups on the six driving wheels - is derived from the super detail chassis. There are some significant changes, not least the excellent flywheel mechanism, the reversion to a three pole motor (although this does not seem to affect the running, which is on a par for the excellent Tornado model from the same stable).


I did a review when the model came out in March 2013 and that can be found here, with a brief overview and potted history of Hornby's 4472 models to date. I think it would be fair to say that I have mellowed since that review came out, and that with some careful modelling and mixing and matching of components, the Railroad 4472 has provided some great modelling entertainment for me over the last few months and will in future be providing the backbone of my fleet of Gresley Pacifics. 


I currently have five of these models in my modelling pile. Four have been picked up with various bits of damage off eBay (two in a week found for £30 and £35 respectively - if you're looking for a perfect as new model, expect to pay between £65 and £80 at the moment) and will in due course be heading for the painting booth once I've finished all of the modifications required.


This one is destined to be the only one of the five models to retain its name: it will become Flying Scotsman as she was in 1948, one of the last remaining "A10s" (that's a Gresley A1 with a 180lb boiler fitted), but there are a number of bits and pieces that have had to be changed.

So, in no particular order:

  • Tall chimney replaced with post 1928 shorter chimney.

  • Smokebox door replaced with a resin cast of Hornby's super detail type.

  • The entire cab was cut off using a combination of drilled holes, a scalpel and a set of pliers, and replaced with a Great British Locomotives 4472 cab. This gives us the correct higher cab cut out, cab glazing, sight screens.

  • All moulded handrails replaced with wire ones with brass knobs. The moulded ones were carved off with a scalpel and the cab filed/sanded down to be smooth.

  • Replaced the driving wheels with fully lined out X9323G type.

  • Replaced the front bogie (which is a Thompson type, and with smaller driving wheels) for a X5086G type with fully lined out wheels.

  • Replaced the unlined cylinders with the lined out and burnished X9561 type.

  • Resin superheater washout plugs from Graeme King's range will be added to the smokebox on this example. I have currently run out and am waiting on supplies. The other 4472 model sports these currently. They are excellent additions.

  • The tender has been totally replaced with a set of Hornby super detail frames, and one of the Great British Locomotives Mallard tender body shells. Moulded handrails all round removed with a scalpel, holes redrilled out and handrails fitted as per the modifications to the body.

  • Lanarkshire Model & Supplies whitemetal buffers fitted to the front buffer beam by chopping off the originals and filing down the buffer beam. Holes then drilled out and the buffers glued in place. Buy them here. No link to the business just a very satisfied customer.
The one major thing I won't be changing is the boiler type, which for 4472 (as no.103) in 1948 was still the original 180lb boiler. Therefore the washout plugs will remain untouched on this example.


I have done some work on another of these models previously, back in October of last year, and you can see the difference in approach to the problematic cab area. On the older project, I added an extra piece to make the cab cut outs the right height. I will on all future models take the approach on the newer project, by replacing the cab altogether. For £9 each, the Great British Locomotives 4472 models have given me an excellent supply of cabs and tenders suitable for my A4 Pacific conversions.

Notice how I have managed to change the coupling to be on the locomotive rather than on the tender on the model in the background. This works much better than the coupling being on the tender and allows a variety of tenders to be attached to the locomotive.


On the previous project (which is destined to become no.60110 Robert the Devil) I replaced the original washout plugs to change the boiler type to the round domed A3 type. 


These can be seen quite clearly in this close up of the firebox area. Note also the replacement handrails. 


The change to the face of the front end is quite clear in this view with the replacement smokebox door, chimney and Graeme King superheater headers. The whitemetal buffers also add to the improvements, and the coupling (from a Hornby L1 super detail pack) is also a pleasing touch. Additions that I could make at this stage are the grab handles on the curved sections of running plate and the middle cylinder cover (one I think I need to experiment with to make a resin cast for a uniform look across the A3/A10 fleet). 

So for the moment, that's it on the Gresley A3 fleet. All are left hand drive, I must add, except for one which I hope I will be able to start and finish the physical modelling over the course of this week before I go up north for a running session at the end of this coming week. I may well have no.103 in tow with me as I'm quite proud of how she's turning out. Certainly I am enjoying the modelling a lot. It's giving me the locomotives I want and I'm learning new skills and gaining new ideas all the time. It's been a great exercise.


So on that basis, I owe Hornby a small apology. The Railroad 4472 is still overpriced as is, but second hand and with some ingenuity, you really can turn these into rather convincing models I think. A better modeller will produce something far better than I, I suspect, but for now I am enjoying the journey.

One last thing before I call it a night. The locomotives I am modelling are as follows: no.60 The Tetrach (LNER livery), no.97 Humorist (LNER livery), no.103 Flying Scotsman (LNER livery), no. 60110 Robert the Devil (BR branded LNER livery) and no.60112 St.Simon (BR branded LNER livery).


All apple green, all very different in a number of details and one in particular a slightly more difficult build than the others (Humorist will require changing from left hand to right hand drive and a few other details swapped too). 

Until next time. 

"LNER no.97, Humorist"

$
0
0

No prizes for guessing the identity of my latest Railroad Flying Scotsman conversion I hope…? 

This particular model was second hand off eBay and advertised with a broken buffer beam. I decided it was too good an opportunity to pass up, and besides, I had always fancied a model of no.97. Since I was going to carve up a body shell extensively to make it right for a 1947-49 era Gresley A3 anyway, why not go the whole hog and modify an already broken model into something rather nice and unique?

This build took place over a three day period and is perhaps the quickest project i've undertaken, intended for running in at Little Bytham tomorrow…but that's a by the by for now.

Humorist is going to be painted in the LNER's apple green livery, albeit with her Thompson renumbering scheme number, 97, to be applied. I have followed the same methods I undertook for no.103 here and grafted the replacement cab from a GBL Flying Scotsman model onto the body shell, once the cab was completely removed.


At this point, the buffer beam was glued back on and worked on using Gamesworkshops green putty to seal the gaps.  

The round dome was cut off using a hacksaw, and the remnants filed down. A small cut off of plasticard (0.2mm thin) was stuck underneath the gaping hole, and Gamesworkshops green putty was used in conjunction with this to fill the gap. Humbrol filler went over the top later and was filled down to make a smooth, strong bond.

Note also that at this same stage I took a scalpel to the right hand drive steam pipe, also filing and sanding it down to smooth the sides of the boiler out. In the same session, I fitted the Graeme King resin super heater headers. 


I then put the boiler and smokebox into grey primer to check the finish of certain parts, before fitting the resin stovepipe double chimney after removing the original single chimney using a hacksaw. At this point I fitted the Graeme King resin dome to the boiler, simply gluing it in place with super glue.

The GBL Flying Scotsman cab was test fitted, and then later glued in place with super glue. Fitting the cab requires cutting down the lower sides of the boiler's back head and filing down all around the edge of the cab space. Once done though, the fitting is pretty clean and looks neat enough.


On Friday, Isinglass delivered a set of drawings for no.97, and I set to work creating its unique smoke deflectors. I photocopied and then printed the smoke deflector drawings, and then created a paper template from which to cut and file back a spare set of Graeme King A2/3 deflectors (left over from my A2/2 build a few years ago).


Returning to the locomotive, a further blast over with primer showed I had a long way to go with the scars on the cab and boiler from removing moulded handrails and the like.

I used a GBL Mallard's steam pipe, suitably shortened, to make the model left hand drive instead of right hand drive.


One detail I forgot to mention last time around is that if you fit super heater headers, you will need to move the second set of handrail knobs from the front of the engine forward slightly to compensate, as they did on the real thing as it happens!


I used a scalpel to remove the reverser on the right hand side of the model, and then relocated it to the left hand side. Sprayed all over grey Humbrol primer. Lots more still to do but she is at least presentable for tomorrow.


I finished off, and then fitted the smoke deflectors (which have had their handrails added).


White metal buffers from the usual supplier were fitted too. 


I also did a bit of tidying up around the buffer beam area, which had originally been broken off prior to receiving the model off eBay. In retrospect, more needs to be done but at least it looks straight and true now, if a bit rough and ready!


Humorist was then paired with one of my spare GNR tenders in LNER livery, a perfect companion for the intended no.97.


And to round off the blog entry, here's a "before and after" shot with another of those Railroad Scotsmans, currently not modified at all and waiting to take its place in the works queue.

You know, I know, everybody knows that my modelling is not perfect. It really isn't: it's flawed, sometimes rough and ready, but I strive to do better with each build and with this one, I feel there's a lot I could have done a lot better.

However I had never up to this point converted a right hand drive Pacific into a left hand drive one so had no point of reference with which to work with. Therefore the results above should be indicative of a successful first conversion using the Railroad 4472 model as a starting point. Lots to do better but not bad for a first attempt.

Truly, budget modelling is going to be the way to go for me. I've already had to sell a lot of my more expensive models and take up modelling, I figure why not continue in this vein and enjoy it for what it is.

On that note, enjoy the sunshine, and until next time.

"Tender thoughts…"

$
0
0

The next stage of my descent into madness over building A4 Pacifics for my new layout has arrived. I have taken delivery of a 1935 tender for which I am confident I can now create a mould for a much simplified resin copy. I ideally need eight (!) of these for my future plans and it's worth taking the time now to get it right.


This means that Silver Fox, which as has been correctly observed, has been pulling the wrong tender previously, will now be united with the correct type. This is probably a good moment to show how we can sling any type of Hornby tender behind the Bachmann models - I've standardised on the Hornby Tornado/Railroad Scotsman drawbar, which is extremely useful. 


On a related note, the (practically mint if a tad dusty) A4 locomotive (Golden Plover) which I bought specifically for the tender, has become available for sale. Feel free to PM with an offer, it won't be used in my modelling plans.

"Mallard"

$
0
0

I have spent an inordinate amount of time, effort and some (budgeted) money on building up a few prototypes of A4 Pacific models to help myself develop my modelling more, and to provide a clear cut way of making the locomotives I want for my future layout.


One locomotive I plan on having is Mallard, and to be frank given my previous (extremely flawed) attempt at making the speed record holder (seen above) I need to make the next one look the part on a number of levels.


So, to our third prototype in the A4 conversion story. This one is based on the Hornby Railroad A4 model, which funnily enough is of Mallard herself.

This conversion requires new valve gear (super detail set from eBay) and new cylinders (super detail, from eBay) and though costing more in terms of the modifications to the chassis, actually in effect requires less work and effort to get to this stage than the Great British Locomotives A4 models.


Since this already has the valances cut away, it was just a matter of removing the moulded handrails on the cab and fitting new brass ones, and replacing outright the ancient tender drive tooling that Hornby bizarrely brought forward to produce with their new Railroad model. That is literally it aside from the same repainting that we saw with Silver Fox earlier in the year (though I will have an interesting blog on that soon).


Lining up my three prototype A4 conversions makes an interesting case study. On the extreme right, no.17 Silver Fox, which was the first and is a GBL body shell on a Bachmann chassis with a Hornby/GBL hybrid tender.

In the centre, what will be no.8 Dwight D. Eisenhower, following loosely the same method as Silver Fox but with the non corridor streamlined tender.

Then of course, we have what will be no.E22, Mallard for contrast. The big difference between the three models is in the front end: resin chimney and after market buffers make Silver Fox look rather different to the Hornby model, despite being of the same locomotive class.

I'm leaning towards the Railroad model again at this point, because not having to cut away valances is something of a relief. But the cost of replacement valve gear and cylinders puts the overall conversion project for a Railroad A4 above that of the my cheap £3 GBL body shells plus whatever Bachmann A4 chassis I can get my hands on, second hand from eBay.


I hope I can emulate this photograph, seen in one of Peter Townend's excellent volumes (I thoroughly recommend picking up The Colour of Steam, Volume 4, if you like Gresley Pacifics and have a penchant for late British Railways steam.

Until next time.

"Little Bytham"

$
0
0

A little video of some runs Silver Fox made alongside a proper Hornby A4 (namely, Merlin) owned by Tom Foster and my solitary Thompson A2/2, Wolf of Badenoch, on Tony Wright's exquisite Little Bytham layout.

"The layout building begins…"

$
0
0

Many years ago, I had a little six feet by four feet model railway. It was a Christmas present from my father and grandfather, when I was seven years old.

The baseboard which formed that first model railway formed the next, which was christened Copley Hill in 2006 and formed the basis of this blog for many years. I had lots of fun, whether it was filming those early episodes of The British Railway Stories, filming the Hornby Vs Bachmann review videos (sorry for the lack of updates there by the way!) or just watching my favourite trains go round and round.

Times change, and interests grow. I wanted more than a roundy round with a shed in the centre. I wanted something which could sustain my interest and increasing locomotive fleet.

This Christmas, that baseboard turns twenty years old, and it will form the centre board of the fiddle yard for my new model railway, as yet unnamed.


So in the last few weeks I made a start, finally, on replacing Copley Hill. I started with building the first of what will eventually be six scenic baseboards.


They are laser cut baseboards, available from Tim Horn here. The reviews in the model railway press had been favourable, so I thought I'd give them a try, buying his pack of three light weight baseboards first.


They go together very well, with nothing more than press fixing, a bit of wood glue and a small mallet. Perfect for my hamfistedness!


This afternoon, I finished the last two of the first three boards, and then started layout planning. I have a vague idea of what I want from the finished layout, and so put together a bit of a photo opportunity.


So the idea is to create a mainline on a lower level and one on a higher level, with tunnels at either end and making use of retaining walls almost everywhere.


What I like about this side is that the width and length of the baseboards make them pretty easy to handle.


The crossover of the two lines is likely to include a girder bridge, which I am working on.


The embankments are likely to be built up by sections of off cut foam board.


So I'm afraid, not a lot of detail today. Forgive me, it is Sunday and I am preparing for the week ahead.

Please feel free to say hallo to me at the Talyllyn Railway on Friday if you see me out and about. I will be there with The British Railway Stories' artist Dean Walker, presenting a special piece of his artwork for them to auction off in aid of repairing their no.1 locomotive.

Until next time.

"Casting resin tenders…"

$
0
0

The great thing about model railways, is that one day you could be building baseboards, painting a train, or messing around with rubber moulds and Alumilite resin plastic.

As regulars to this blog may be aware, I am currently in the process of building a fleet of A4 Pacifics, and as a prototype I made a model of no.17 Silver Fox. Well, that model hasn't got the right tender type behind it. Until now...


This is a semi-successful first casting of a streamlined 1935 A4 corridor tender. This is intended to go behind Silver Fox, and hopefully will lead to further castings for the rest of the intended fleet of A4s which share this tender type (more than you'd think!)

I will make another attempt later next month with this mould and a two piece one, but for what it is, not bad for a first casting.

Please note that this one is a solid lump of resin! The weight of the piece means it probably won't need metal weights on the chassis when fitted to the Hornby tender frames it is intended for.


I am going to try a two piece mould next month to compare methods. The weight of the solid one means I probably won't need to add metal weights to a set of Hornby frames! The Alumilite resin used is extremely hard. I will clean this prototype up during the course of this and see how it comes out as a tender.

You'll note I left the window moulding on the rear of the tender - will probably just paint the window black and the surround silver. You can't see into the non existent corridor on the Hornby ones anyway…

Until next time!

"…Mallard, and a minor rant on buffers"

$
0
0

So I am aware I may be boring a large majority of you at present. For the last two years, the majority of my blog posts - when it comes to modelling anyway - has centred around the Gresley class A4 Pacific. In my defence, they are a large part of my future modelling plans and my test pieces I do now will provide valuable experience for when I go to do future models.


Case in point: I have decided beyond reasonable doubt that I severely dislike Hornby's front buffer apron piece. The actual buffer beam shanks are much more slender on the real thing in my opinion:


Bittern, masquerading as Dominion of New Zealand three years ago, showing the very thin buffer beam shanks.


Now look at the buffer beam shanks on my two A4s. There's no comparison: the Maygib products on the Great British Locomotives body shell is by far superior. A real pity as that's the one thing which really lets the Hornby Railroad and super detail models down in my view.

(And before anyone starts, yes I am aware of the difference in shade between the various photographs of the models and the real thing above. Wait until the models are weathered and then sealed with Johnson's Klear and then judge!)

Things still to do on no.e22 Mallard include adding lamp irons, cab spectacle etches, cylinder drain cocks, bucket seats, cab glazing, transfers on front of casing and stainless steel numerals on cabsides fitted.

Quite a list, but it does feel good to get off my backside and do some modelling, even if it's just a respray with some added details in this case.

Until next time.

"Hacked emails and other updates"

$
0
0
Firstly, my apologies ladies and gents - the old company email, copleyhill@live.co.uk was hacked earlier this week and was sending out odd emails. I've since got it back under my control and have decided to retire the account for now.

Please email us on copleyhill@outlook.com instead for the time being.

There are loads of modelling updates but I haven't had time to photograph nor write about them: a few changes at work and my holiday tomorrow have made it difficult to just sit down and do anything blog related.

However…next time I will have some updates on the next The British Railway Stories book. It promises to be a good one.

Until next time!

"Mossflower Abbey: new layout, new name, same old trains…!"

$
0
0

Imagine if you will, for a moment, that the bare wooden boards contain a cutting, with a ruined and moss covered Abbey on the crest of the hill overlooking the railway line, and that the straight out of the box Bachmann B1 seen before you is a little more weathered (and carrying the appropriate headlamps…)

The driver of Thompson B1 no.1123 is carefully gauging the road ahead past the ruined Mossflower Abbey, slowing for the Brockhall tunnel...


The driver is not aware that they are about to be passed by one of Gresley's fastest on a running in turn...


From the approaching tunnel, a blue vision appears, and no.17 Silver Fox roars towards the B1 and her crew...


Carrying an express head code, the A4 Pacific has been put onto this train in order to be brought back into London King's Cross. The B1's driver gives an admiring glance across the cab as the A4 passes, before concentrating on the road ahead and opening the regulator further. 

The sight of the streak in flight has stirred the old railwayman, and no.1123 finds her legs as she vanishes into the darkness of Brockhall tunnel.


Okay, so none of the above is real, but I am practising for when the scenery is finished, and trains can finally run at full point around my little roundy round. That day is fast approaching...

I will go into more detail regarding the baseboards, their design, construction and the intentions behind Mossflower Abbey at a later date. For now…I'm going to enjoy running the B1 and its short train back and forth as a little shuttle for now!

Until next time.

"A few modelling updates"

$
0
0

Evening all. I thought I'd do some railway modelling to cheer myself up. Not been feeling myself for some time as many of you will know, but I am getting better every day, and that's due in part mostly to one special person in my life at the minute. I am very grateful to her.


So to kick everything off: one London & North Eastern Railway long wheelbase covered carriage truck, or CCT for short. This is a Parkside Dundas kit and will get a weathered teak finish and some better couplings very soon to fit into one of my rakes!


Next stage: a brief review of Bachmann's current Thompson B1 model. The long and the short of it is that I've given up on Hornby doing an apple green B1 in my lifetime (!) so I bought a cheap Bachmann model instead.

This one depicts LNER no.1123 and has a superb chassis. The superior paintwork on this model really makes an old model look new.


I've dug a few older body shells out of my stock box and confirmed one thing is true: the older body shells will fit onto the new chassis by simply replacing the body and using the same screw. They are virtually identical bar the paintwork. That being the case, I am considering mixing and matching to get the locomotives I want.

These four B1s are all apple green, and have various detail differences between them. Utilising a modified Bachmann V2 tender (close enough to the Atlantic tender I will be portraying) is B1 no.1039, which will be made using another of the no.1123 models and a spare Mayflower body shell.

Springbok will be made the same way but keeping the tender of no.1123, and can be seen as the spare body shell with the red nameplates. These will be replaced with the appropriate etched nameplates in due course.

Finally, 61024 Addax will use the same chassis and tender, albeit keeping LNER on the tender but having a BR number on the cabsides and an etched numberplate on the smokebox door.


All of them will get a little modification that I am very happy with. The standard release from Bachmann comes with the awful plastic coupling that gives a huge gap between locomotive and tender. No.1123 is now permanently coupled using nothing more than a Hornby Railroad Scotsman standard tender to loco drawbar and the screw which accompanies it to screw onto the tender.

The other end goes through the body shell opening under the cab, and between the loco body shell and the chassis to be permanently screwed in using the retaining screw which keeps chassis and loco body fixed together. The result is something more appropriate in look.


So that's it from me, except to say that I've finally started laying my C&L track work! Which looks vastly superior to the old Hornby and Peco track I'd become accustomed to using in my modelling all these years. No going back now, I am on the first rung of a long modelling ladder and I will be doing all I can to improve on a monthly basis.

Next update I will hopefully be announcing something rather exciting officially for the first time. Watch this space…

Until next time.

"The Permanent way…"

$
0
0

The next stage in the story of Mossflower Abbey/Little Ganwick* is a difficult one - laying the track. Seems easy at first until you remember that each section of the layout is removable.


I've used Woodland Scenic HO scale underlay. This had several advantages: firstly, it's about the right height and depth I want for the track bed, and secondly it came in two big rolls which covered the length of the five boards easily.


The underlay was stuck down using standard PVA glue. Before gluing it down, I used some double sided tape to hold the underlay in place, and a permanent marker to check the alignment of the track.

That in particular is important, as I will now demonstrate…


Each of the boards fits together using identical metal dowels.


Before separating the boards, I used a scalpel to cut the track bed cleanly. Each of the boards are now entirely separate as a result.


I numbered the boards 1-5. The centre boards 2, 3 and 4 are not just interchangeable, they are reversible.


Effectively, the layout can be set up as a 3, 4, or 5 board layout dependent on the size of area available to it. This means it is can also be extended in future if one so chooses…


The next stage is to lay some track and make when fitted together, all the track lines up perfectly to allow trains to run without any problems. This is the bit I am most nervous about as the track will also have to have wire droppers soldered and put through the baseboard to its underside. Could go very well, could also go very badly…!

Until next time, where we'll have an update on rolling stock I hope.

*I'm struggling to choose between the two names - perhaps Mossflower Abbey could be the main structure on the layout, and the layout could be called Little Ganwick? More on that next time.

"Books and model railway products"

$
0
0

Just a quick note to say that I will be closing the order book for Tale of the Unnamed Engine from Thursday, as a new pricing structure for all of our products will be coming into place from the 1st September.

We will be reducing the price on the paperback book in the run up to Christmas in order to clear our remaining stock. This potentially gives us some space for the next paperback book...

The model railway products will gain their own page in due course and more news on updated etches will come soon.

I have been very busy with work and family matters so please accept my apologies if any orders are currently running late. Any orders placed since the 20th of August and before the 30th August will be subject to the old pricing structure on all products.

Until next time.

"Springbok"

$
0
0

Recently I welcomed back an old friend. Bought in my youth for a mere £25 (and at the Bluebell Railway no less) no.1000 Springbok has never graced the pages of this blog, because she never actually worked! The split chassis mechanism was faulty from purchase (but to be fair, she was second hand) and for many years she adorned a small corner of my room at Loughborough University.

Having taken delivery of an excellent, up to date and new Thompson B1 from Bachmann, and discovering the new chassis would fit the old body shell, I made haste and bought a second to fit to old Springbok. Now for the first time she runs! However I intend to bring her into the 21st century a tad, and she is becoming the guinea pig for a series of modifications intended to bring my Bachmann B1s more into line with Hornby's.


The first change is to the buffers. They have been completely replaced by a set of Hornby's. The difference to the original buffers can be seen in the next picture, showing my apple green B1 spares which will eventually form part of a small fleet of four or five locomotives.


I intend on having a nice mix of electric lighting, and non electric lighting, named and unnamed B1s (none of the Hornby ones will be named, only two of the Bachmann ones will be). The transformation of the front end by simply replacing the buffers is too good to pass up and now all of the Bachmann B1s will have this modification from this point on.

Until next time - when I hope to be reviewing the most eagerly anticipated model of the year: Hornby's Gresley P2.

"Tale of the Unnamed Engine - price reductions effective immediately!"

$
0
0

Effective from today, the paperback version of Tale of the Unnamed Engine is now on sale for £5.99, a reduction of £2 exactly. This reduction in price is also met by a halt in postage costs. There will be no increases in postage for the remainder of the copies on sale.

We are now into the last few copies, so get your copy of the paperback while you can, because it is unlikely to be printed again for a very long time!

The eBook has also been reduced to £2.99 (Amazon charge an extra 9p on top of this as part of their fees, therefore the total price per download is £3.08 at present).

We are looking to clear all stock of the paperback book so that we can fill our storage space with copies of the paperback version of Book 2 (more on Book 2 later in the year).

I have refunded £2 to all of our customers who have purchased the paperback at the original, higher price in the last few weeks as a sign of good faith.

Until next time.

"Some budget modelling…and Thompson's B3/3"

$
0
0

It's been a strange few weeks. I turned 27 last week and had a great week at work, culminating in a lovely night out with some work colleagues on the Friday.

The sales of our book, Tale of the Unnamed Engine, hit a nice high with around twenty dispatched since we announced reductions in the price of the paperback.

My latest romance hit the buffers abruptly - sadly for me, it was not to be. She was a lovely girl and I am sure she'll find someone special, because she was - is - special. Just not me sadly.


And in modelling news, my budget railway modelling took a much needed boost this week with the release of Great British Locomotives magazine's latest model - Great Central Railway no.506, Butler-Henderson. The model is quite clearly an extremely good reproduction of the Bachmann model. The price difference is around £120 as this retails at £8.99…!


Overall, the model has a lot of modelling potential. Removing the moulded handrails and adding proper wire ones aside, the tender is the one item that will find use on layouts across the country.


The body shell unscrews from the moulded tender frames and die cast wheels, and can with no modification whatsoever be fitted directly onto the tender frames of a Bachmann GCR or ROD tender, as demonstrated ably by mine.


The body shell can be modified to screw onto the chassis quite easily by drilling two holes at the front and two at the back, and then screwing in the retaining screws from the original body shell. That's it job done!


The reason for this? Providing the correct (or I should say, more correct) pattern tender for my Thompson B3/3 conversion.

This model has been on the go for around two years and we are nearly on the finishing straight. I will be wiring up the tender pickups to the locomotive's chassis and finishing the body shell off in the coming weeks.

I haven't decided on whether it will retain fully lined out LNER apple green livery or be painted straight into plain black with LNER lettering on the tender and the number 6166 instead of 1497.


That was pretty much it, except for the renumbering and renaming of the Thompson B1 in the background, no.1039 C.M. Hollingbery on Thursday evening of last week. It'll remain as such for all the time I am its owner.

I hope to have taken delivery of a main range Hornby P2 in the next week, and I will be doing a short write up on the interesting four wheeled van you can just about make out behind the Great Central tender in the picture above…

Until next time, enjoy the last of the summer sunshine in September.

Simon
Viewing all 149 articles
Browse latest View live